Well, I’m back with another DIY project.
So it’s finally time to talk about our first pumpkin project. I know I’ve basically told you everything about the rubber band pumpkin in the post about Sunday, but in case that post was just a little too confusing, I’ve decided redo it. So forgive me if you’ve read that post. I have never heard of using rubber bands on a pumpkin seriously, but if you know me well if I know certain things are in good places, I might actually try it out.
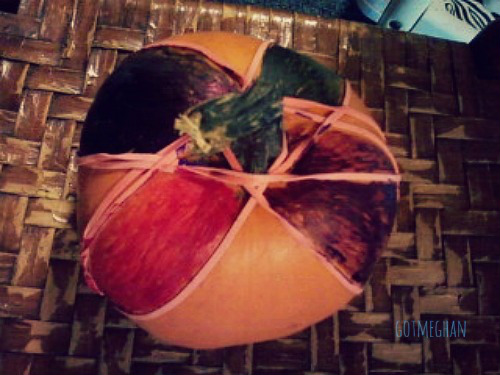
I got the idea from this little magazine called Country Living, I’m actually thinking about having my mom get the next edition for November. I’m already seeing my nana’s future layout of her kitchen table for Thanksgiving! Anyway, getting a little ahead of myself. On page 62, was this cute little idea you can do to a pumpkin and I thought it was so different and cute that I knew I had to do it. The only thing you need that was the same as the directions in the magazine was the rubber bands.They used the tan bands as they are much larger than the smaller pink ones, with those you can really stretch out and basically use the entire pumpkin as your canvas. My grandparents only had the pink rubber bands, so I had to make do and I was perfectly fine with that. They worked just as good as the others, but getting them to stretch out as far as the tan/white ones was not an option for me, because I was too afraid that they were going to bounce back at me and hurt my toes. I wrapped one end of the band around the stem of the pumpkin and stretched it out to the bottom and hoped it stay there. In all, I got six or seven bands on it and once I got one on I’d turn it around and do the other side. That seemed to be a good idea too!
After the last one, I tried to see if I can add one more onto it, but neither side would let me. I thought it was adorable and so did my nana! I felt so proud of myself too, because that was the one craft project where I’ve actually been able to do all by myself. To make things even better! My mom got us a packet of different colored Sharpies and I decided that I could color in some of the holes around the sides of the pumpkin. I only did four sides of it. I used the colors, blue (which you couldn’t see), purple, red, and green. In a way, it was like the changing of colors in autumn, except I’ve never seen a blue or purple leaf before! This DIY project was probably one of the easiest things I’ve ever done! When I went home that night after completing it, I was trying to figure out a name for it. I knew I wanted a girl name, so I first thought of “Ruby” but it honestly didn’t fit. So while I was home, I was sitting on my bed, listening to music like always. Well, I was listening to the band Leaves’ Eyes and they have two songs from their new album, Symphonies Of The Night. One is called Cecelia and the other is Ophelia. I love Ophelia more and when I went to take it home yesterday afternoon. I told both my mom and nana about the name, I didn’t explain the reason to my mom though, but she said that it sounded like a name I’d choose. I don’t know what she meant by that either.


nicely done!
LikeLiked by 1 person
Thank you! 🙂
LikeLike
Looks great!!
Jessica
the.pyreflies.org
LikeLiked by 1 person
Thank you! 🙂
LikeLike